
Strum-Ready in No Time: Ukulele String Change Made Easy
May 14, 2025
Changing ukulele strings may feel intimidating at first, but it doesn’t have to be. With a little guidance, the process becomes much simpler than you might expect. Whether you play a KoAloha, Kala, or Romero Creations, you’ll soon be strumming with confidence again.
In this guide, we’ll break down each step of the process clearly and concisely. From removing the old string to tuning up your new one, every detail matters. Let’s get started—your fresh strings await.
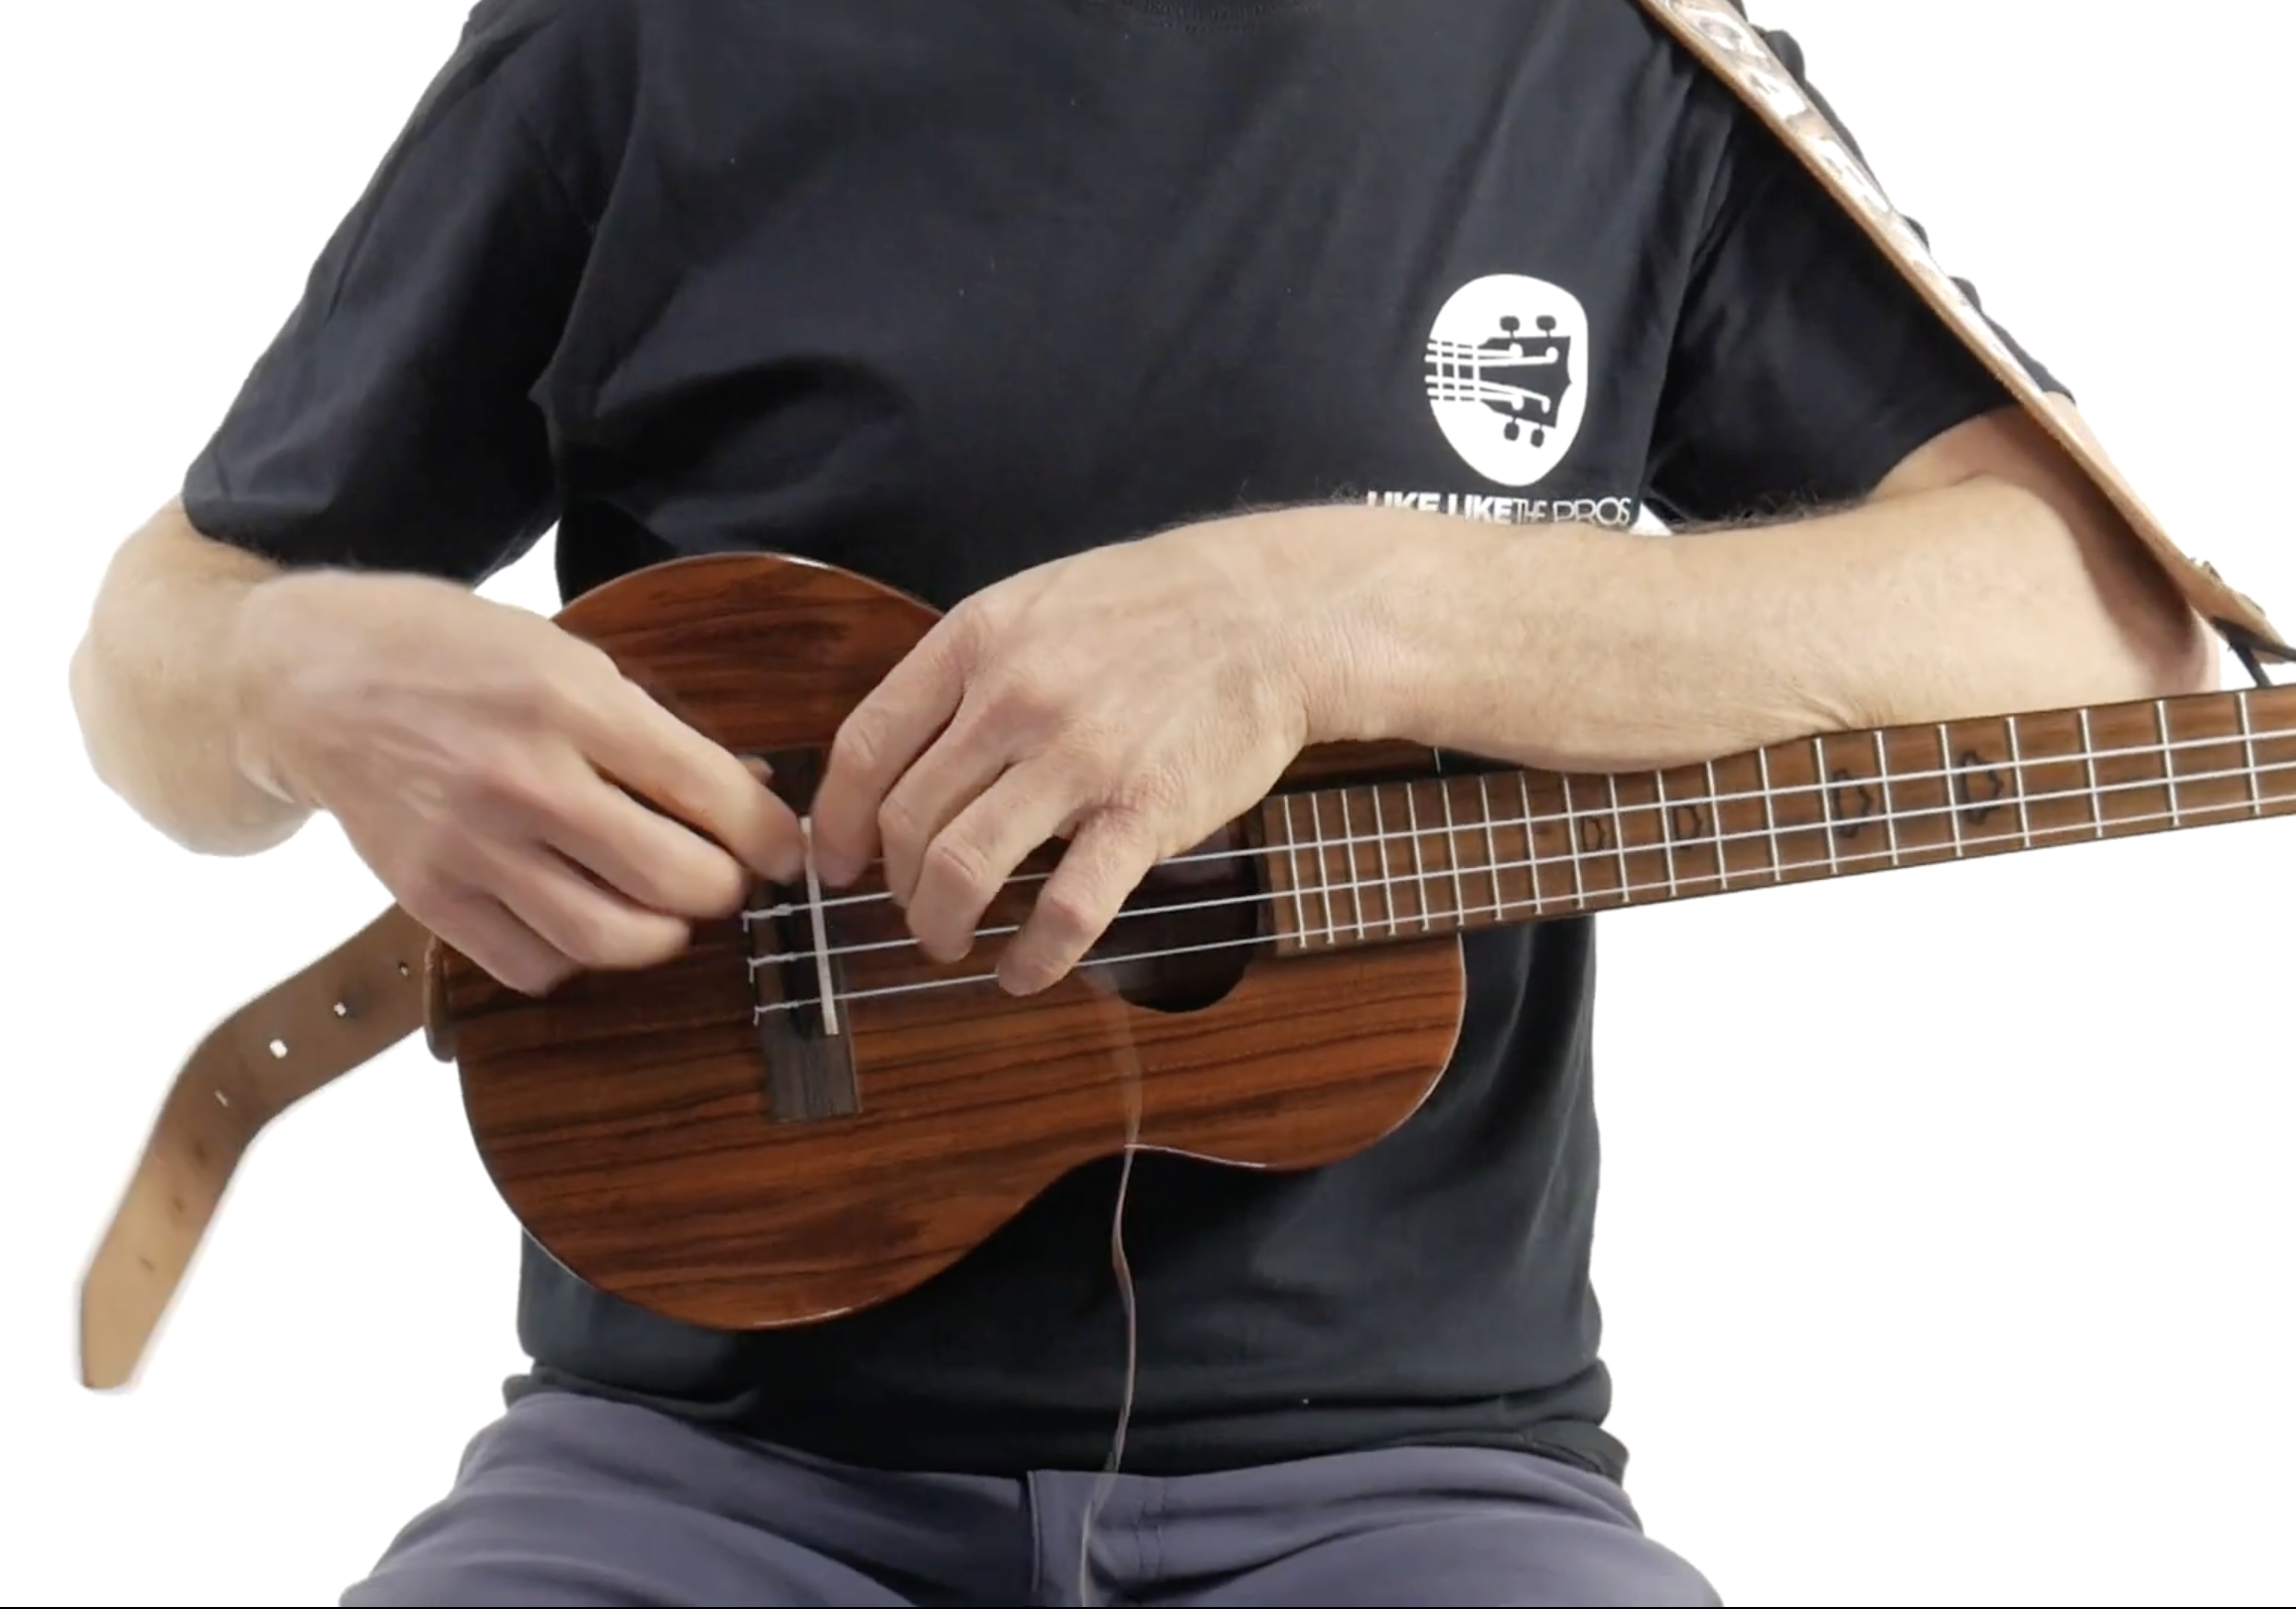
Get to Know Your Ukulele Setup
Every ukulele is slightly different, and knowing how yours works is the first step. Terry Carter demonstrates the string change process on his Romero Creations tenor ukulele, equipped with a low G string setup.
Understanding the specific design of your bridge and tuners helps immensely. Some ukuleles have through-body string setups; others use tie-bar bridges. Knowing yours speeds up the string change process.
Removing the Old String with Care
To begin, unwind the broken or old string from the tuning peg. Gently pull it out, being careful not to scratch the headstock or tuners. Terry recommends keeping the other three strings on for proper neck tension.
At the bridge end, slide the string out from the loop. This part can be tricky depending on how it's tied, but don’t worry—with practice, it becomes second nature. Now is also the perfect time to clean the fretboard.
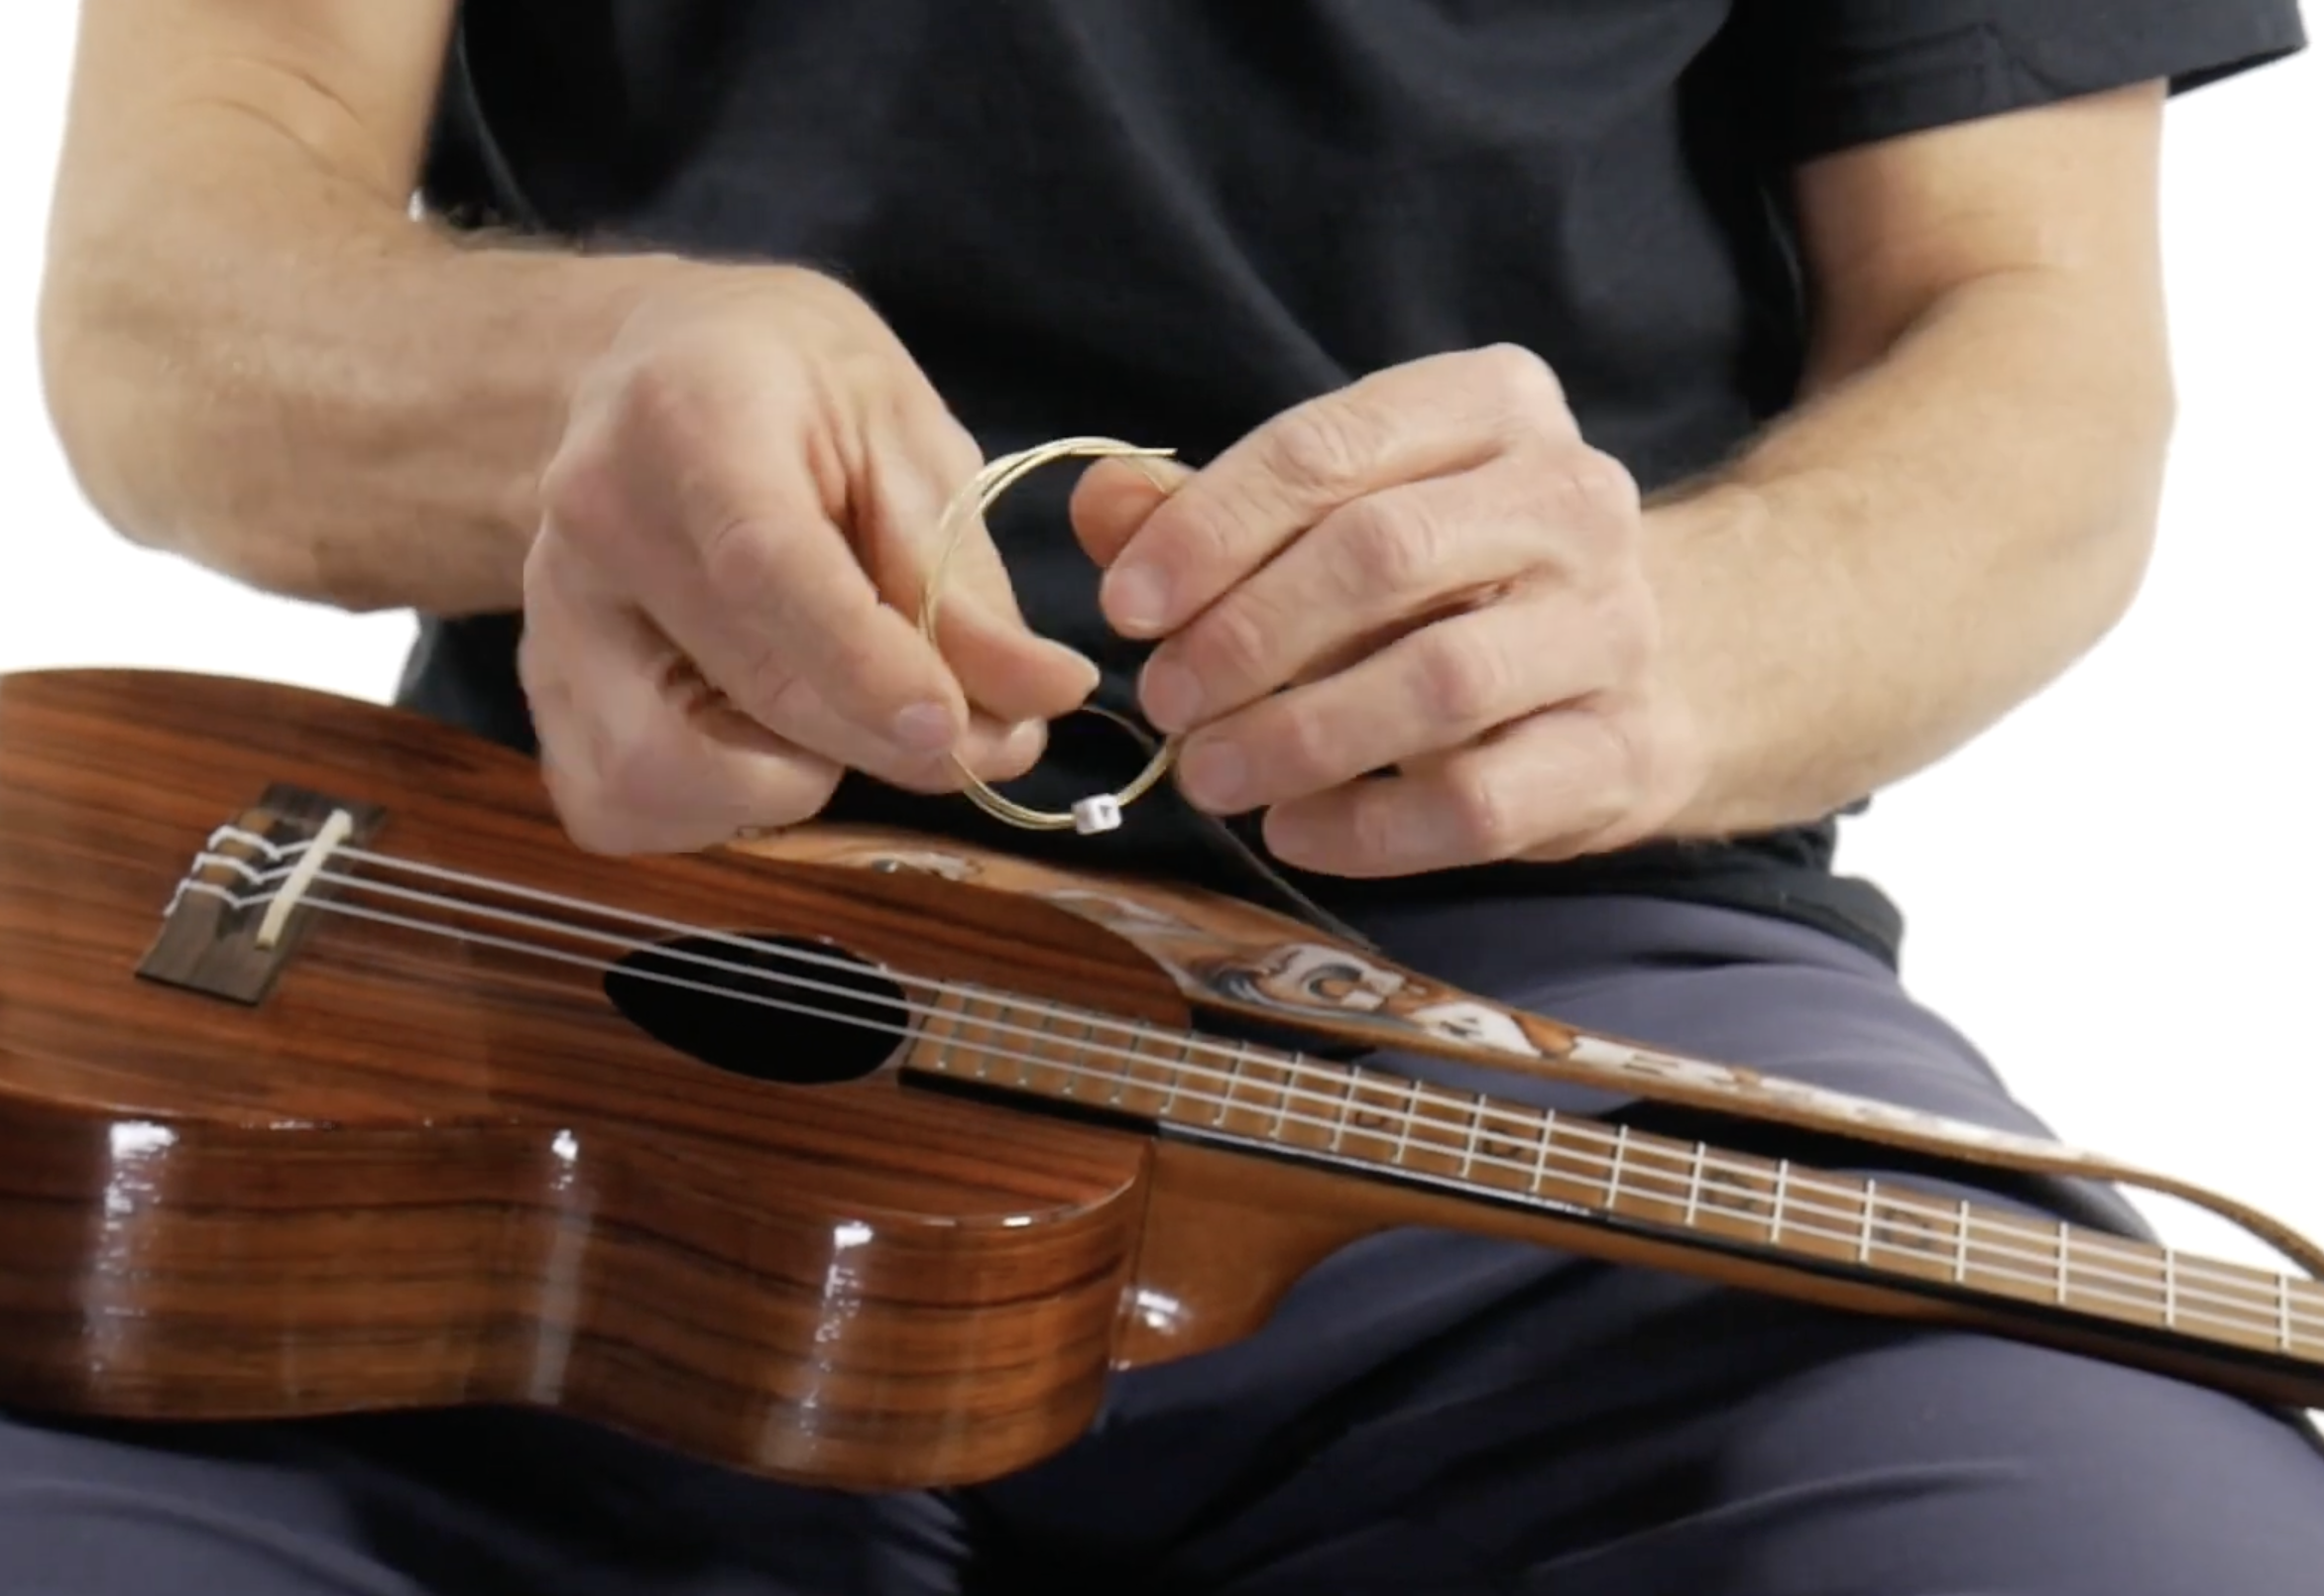
Gather and Prep Your New Strings
When choosing strings, make sure they match your ukulele's type (soprano, concert, or tenor) and tuning preference. Terry uses a low G Pepe Romero string, known for its rich tone and high-quality materials.
These strings sometimes come with beads for through-body bridges. If yours doesn’t require them, simply remove the bead. Now, you’re ready to begin threading and tying the new string into place.
Stringing Through the Bridge Correctly
Slide the new string through the saddle hole and leave extra slack at the end. Terry recommends creating a loop by bringing the string back around and underneath itself to form a firm hold.
For most strings, a single loop is sufficient. However, for thinner strings, doubling the loop can offer more security. Make sure the knot is tight before moving on to the tuning peg end.
Wrapping Around the Tuner the Right Way
Thread the string through the tuner hole, pulling it snug. Leave just a bit of slack—this will allow the string to wrap cleanly and create stable tension.
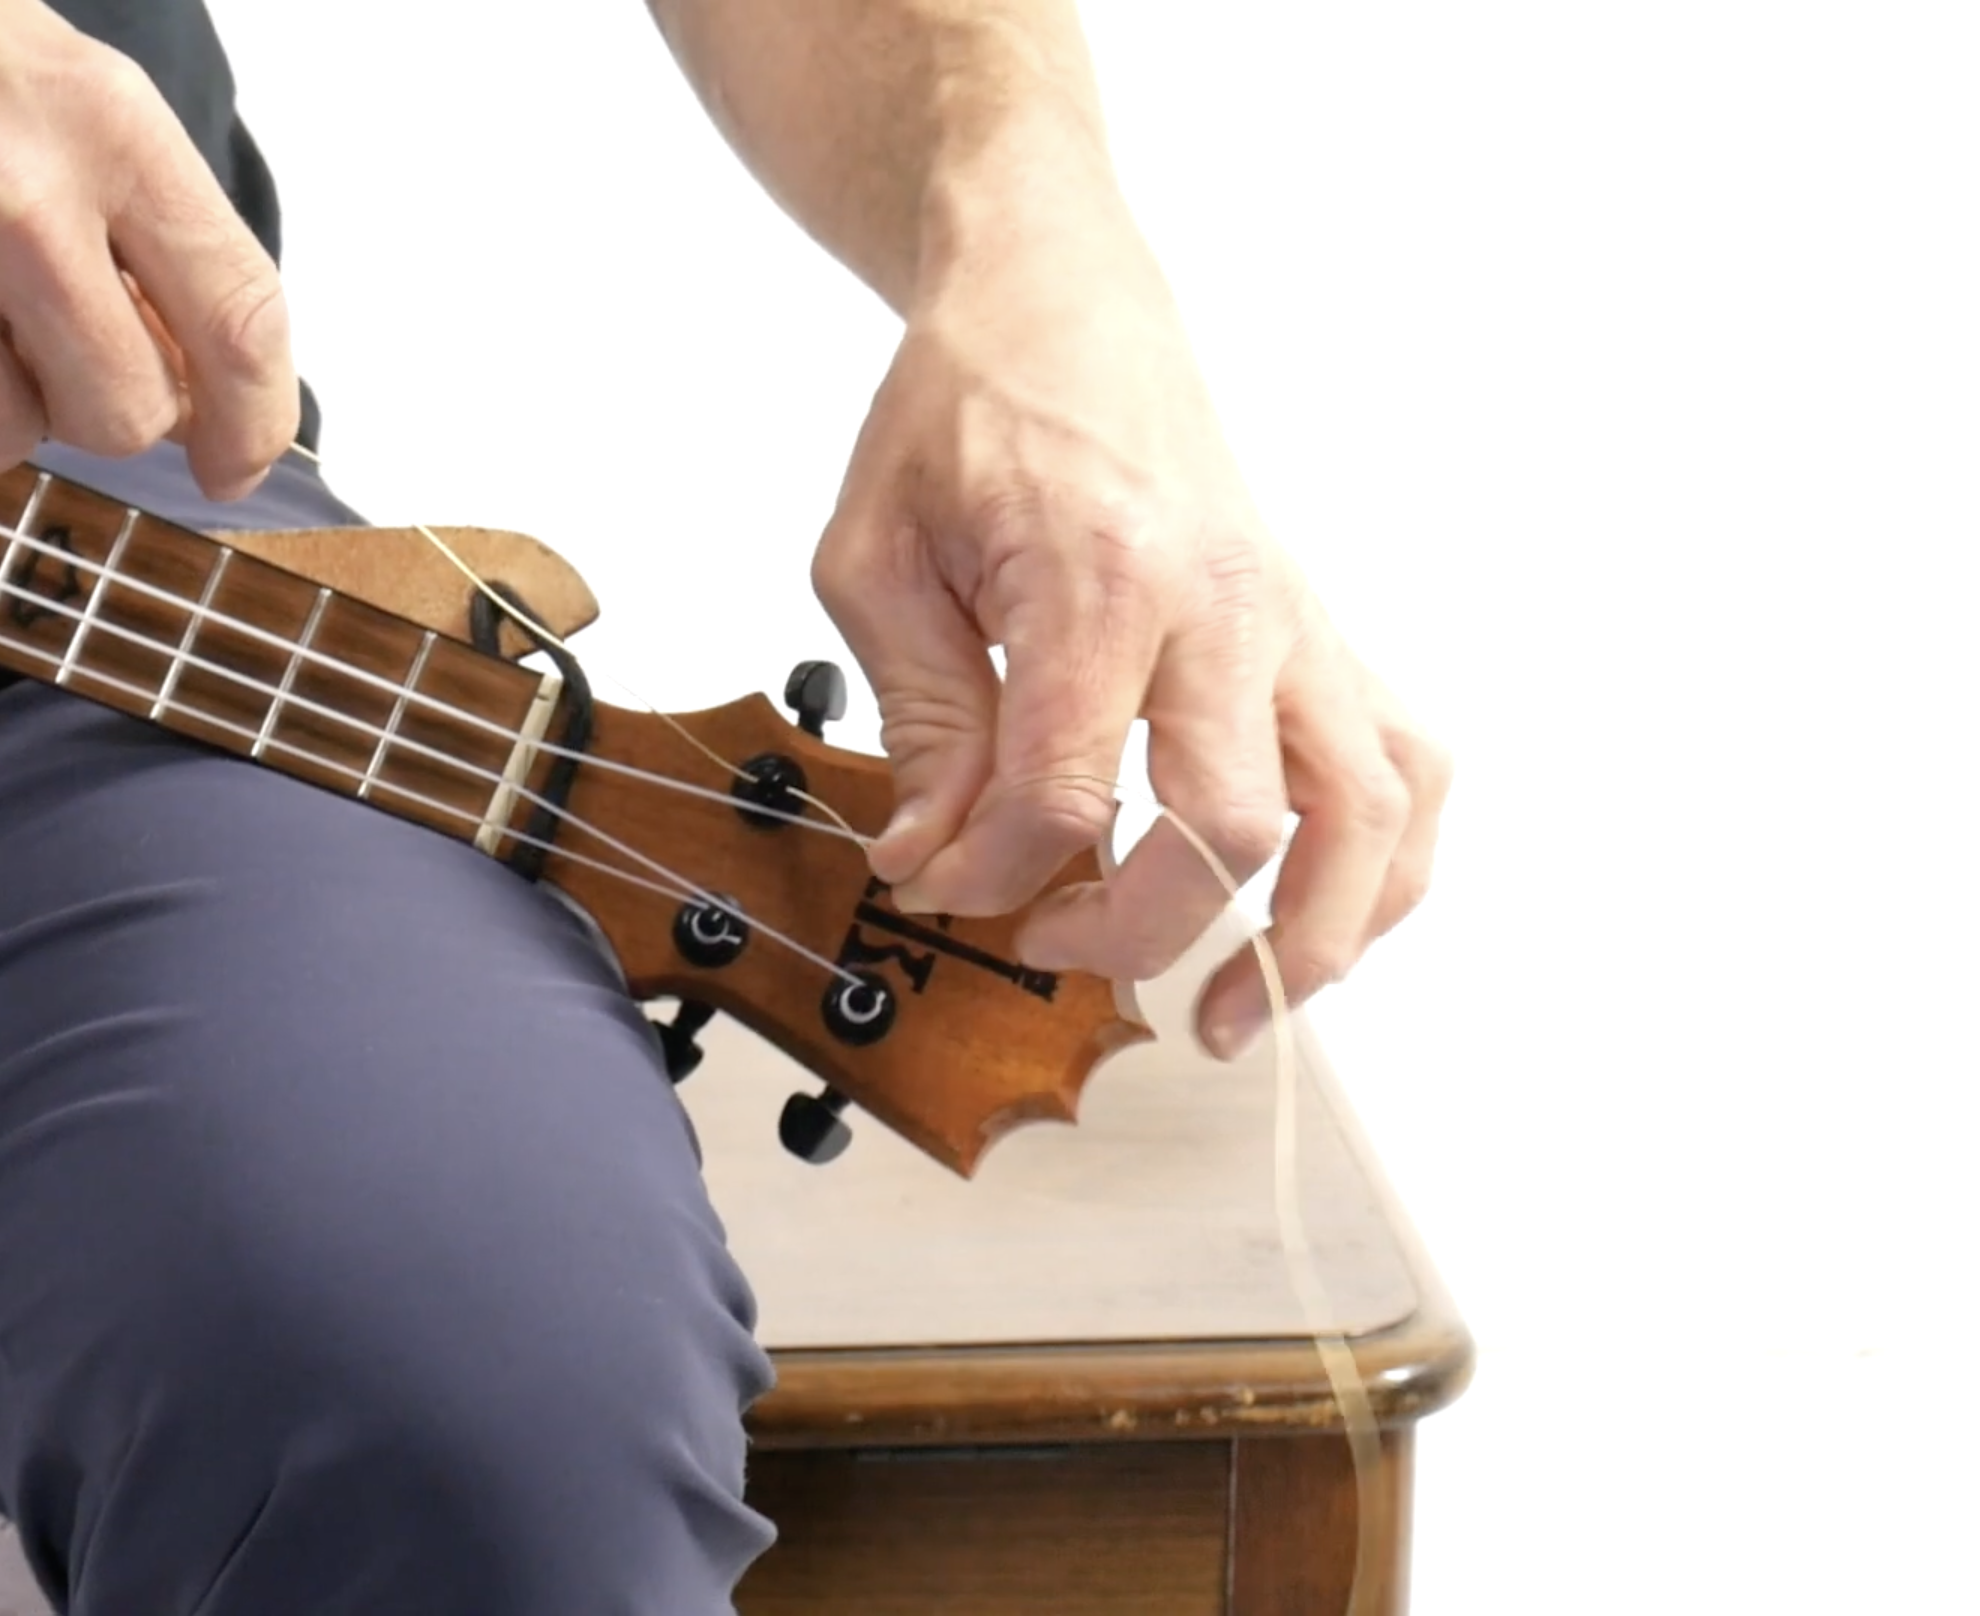
Wrap the string clockwise underneath, then over the standing part to form a locking twist. Maintain tension with one hand while you begin to wind with the other. A string winder can help, but hand-turning works fine too.
Tuning It Up and Holding Tension
As you wind the string, hold tension to avoid slack build-up. You don’t need 20 wraps—two to three wraps are plenty for most ukuleles and keep your tuning more stable.
Once tightened, grab your tuner and bring the string up to pitch. Don’t worry if it doesn’t stay in tune right away—new strings stretch and require a little patience.
Stretch and Settle the Strings
After tuning the string to G (or your desired note), give it a few gentle tugs along the fretboard. This helps speed up the settling process and stabilizes tuning.
Here’s a quick reminder list:
-
Keep one string on at a time
-
Always clean the fretboard
-
Maintain tension while winding
-
Tune gradually and stretch
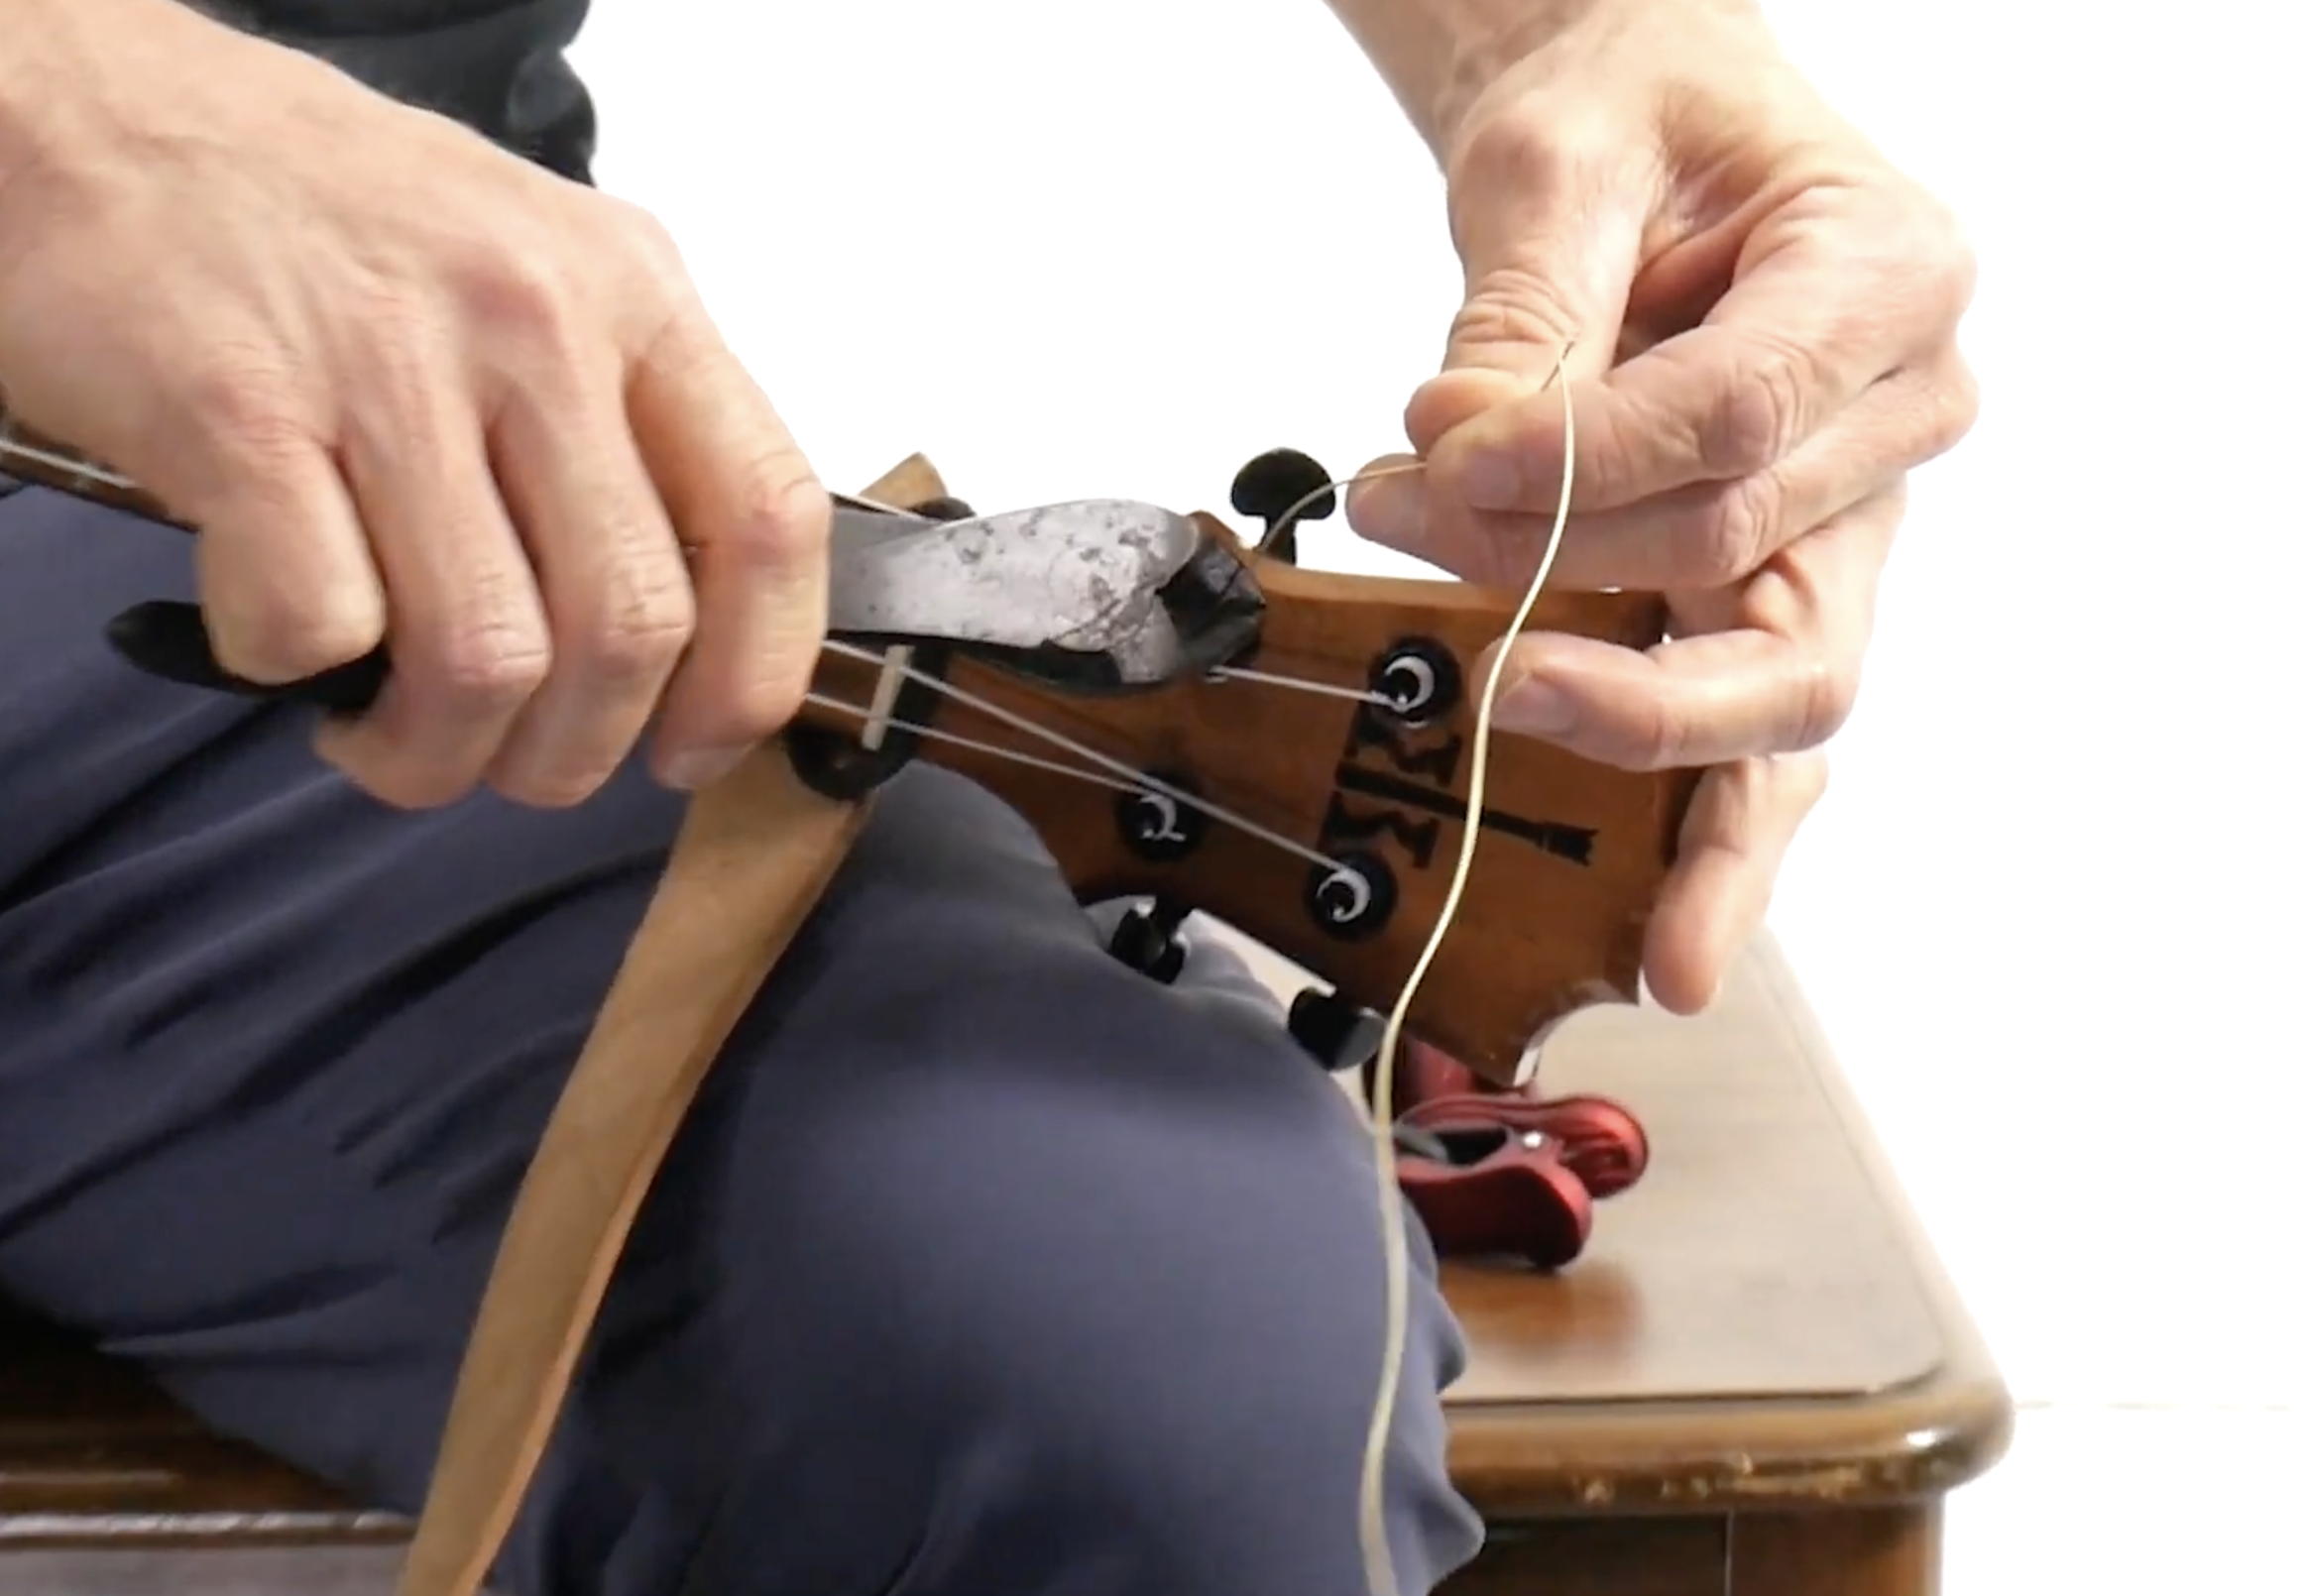
Clip the Extras and Clean It Up
Once the string holds pitch, snip the excess at both ends using wire cutters. At the headstock, cut close to the peg. At the bridge, trim any loose ends that could rattle or interfere with your soundboard.
Keep the area neat. Clean up dust and string bits, then take a moment to admire your work. A fresh string setup can inspire new creativity and better tone.
Finishing Touches and Final Tips
The same steps apply to the remaining strings—just repeat the process one at a time. For ukuleles with tuners on both sides of the headstock, remember that winding direction will vary slightly.
Be patient with tuning over the next few days. Nylon and fluorocarbon strings settle slower than wound strings. But soon, you’ll enjoy smooth tuning and bright, lively tones.
Ready to Strum Again
By now, your ukulele should be sounding crisp and vibrant. Changing strings may seem awkward at first, but like most things, practice makes perfect. Over time, this will become second nature.
Don’t let string changes slow your musical journey. With these steps, you’ll always be Strum-Ready in No Time. Keep practicing, stay tuned, and happy playing!
See available ukulele strings at Terry Carter Music Store
Master the Ukulele at Uke Like The Pros
Master the Guitar at Rock Like The Pros
